
完美的伺服器 – Debian 12 (Bookworm) 與 Apache、BIND、Dovecot、PureFTPD 和 ISPConfig 3.2
本教學介紹如何準備 Debian 12 伺服器(使用 Apache2、BIND、Dovecot)來安裝 ISPConfig 3.2
以及如何安裝 ISPConfig。 Web 託管控制面板 ISPConfig 3 讓您透過 Web 瀏覽器設定以下服務:
Apache 或 nginx Web 伺服器、Postfix 郵件伺服器、Dovecot IMAP/POP3 伺服器、MySQL、BIND 名稱伺服器、PureFTPd、Rspamd 或 Amavis、ClamAV 等更多的。
此設定涵蓋 Apache(而不是 nginx)、BIND 和帶有 Rspamd 垃圾郵件掃描程式的 Dovecot。
1 初步說明
在本教學中,我將使用主機名稱 server1.example.com 、IP 位址 192.168.0.100 和網關 192.168.0.1 。
這些設定可能與您不同,因此您必須在適當的情況下替換它們。
在繼續之前,您需要安裝 Debian 12 的最小安裝。
這可能是來自託管提供者的 Debian 最小映像,或者您使用 最小 Debian 伺服器 教學來設定基本系統。
以下所有命令均以 root 使用者身分執行。 直接以 root 使用者身分登入或以普通使用者身分登錄,然後使用指令
終端機指令:
su -
—————————————–
在繼續之前成為伺服器上的根用戶。
重要提示 :您必須使用“su -”而不僅僅是“su”,否則,您的 PATH 變數將被 su 設定錯誤。
確保您的 /etc/apt/sources.list 包含 bookworm-updates 儲存庫(這確保您始終獲得最新更新),並 contrib、 非自由 和 非自由韌體儲存庫。
啟用
終端機指令:
vi /etc/apt/sources.list
—————————————–
deb http://deb.debian.org/debian/ bookworm main contrib non-free non-free-firmware
deb-src http://deb.debian.org/debian/ bookworm main contrib non-free non-free-firmware
deb http://security.debian.org/debian-security bookworm-security main contrib non-free non-free-firmware
deb-src http://security.debian.org/debian-security bookworm-security main contrib non-free non-free-firmware
# bookworm-updates, to get updates before a point release is made;
# see https://www.debian.org/doc/manuals/debian-reference/ch02.en.html#_updates_and_backports
deb http://deb.debian.org/debian/ bookworm-updates main contrib non-free non-free-firmware
deb-src http://deb.debian.org/debian/ bookworm-updates main contrib non-free non-free-firmware
—————
儲存文件。
—————————————–
2.安裝 shell 文字編輯器(選用)
我們將在本教程中使用 Nano 文字編輯器。 有些使用者喜歡經典的 vi 編輯器,因此,我們將在這裡安裝這兩個編輯器。
預設的 vi 程式在 Debian 和 Ubuntu 上有一些奇怪的行為; 為了解決這個問題,我們安裝 vim-nox :
終端機指令:
apt install nano vim-nox
—————————
如果 vi 是您最喜歡的編輯器,請在以下命令中將 nano 替換為 vi 來編輯檔案。
—————————————–
3.配置主機名
伺服器的主機名稱應該是一個子網域,例如「server1.example.com」。
請勿使用不帶子網域部分(例如「example.com」)的網域名稱作為主機名,因為這會導致稍後的郵件設定出現問題。
中的主機名稱 首先,您應該檢查/etc/hosts 並在必要時更改它。
該行應該是:「IP 位址 – 空格 – 完整主機名,包括域 – 空格 – 子域部分」。
對於我們的主機名稱 server1.example.com,該檔案應如下所示:
vi /etc/hosts
—————————————–
127.0.0.1 localhost.localdomain localhost
192.168.0.100 server1.example.com server1
# The following lines are desirable for IPv6 capable hosts
::1 localhost ip6-localhost ip6-loopback
ff02::1 ip6-allnodes
ff02::2 ip6-allrouters
—————————————–
然後編輯 /etc/hostname 檔案:
終端機指令:
vi /etc/hostname
——————-
在我們的例子中,它應該僅包含子域部分:
server1
—————————————–
最後,重新啟動伺服器以應用變更:
終端機指令:
systemctl reboot
—————————————–
再次登入並使用以下命令檢查主機名稱是否正確:
終端機指令:
hostname
hostname -f
——————-
輸出應如下所示:
——————-
root@server1:/tmp# hostname
server1
root@server1:/tmp# hostname -f
server1.example.com
—————————————–
4.更新您的 Debian 安裝
首先,確保您的 /etc/apt/sources.list 包含 bookworm/updates 儲存庫(這確保您始終獲得最新的安全更新)
並且 啟用contrib、 非自由 和 非自由韌體儲存庫,如下所示一些必需的套件不在主存儲庫中。
repositories are enabled, as some required packages are not in the main repository.
終端機指令:
vi /etc/apt/sources.list
——————
deb http://deb.debian.org/debian/ bookworm main contrib non-free non-free-firmware
deb-src http://deb.debian.org/debian/ bookworm main contrib non-free non-free-firmware
deb http://security.debian.org/debian-security bookworm-security main contrib non-free non-free-firmware
deb-src http://security.debian.org/debian-security bookworm-security main contrib non-free non-free-firmware
# bookworm-updates, to get updates before a point release is made;
# see https://www.debian.org/doc/manuals/debian-reference/ch02.en.html#_updates_and_backports
deb http://deb.debian.org/debian/ bookworm-updates main contrib non-free non-free-firmware
deb-src http://deb.debian.org/debian/ bookworm-updates main contrib non-free non-free-firmware
——————
執行:
終端機指令:
apt update
更新 apt 軟體包
終端機指令:
apt upgrade
並安裝最新更新(如果有)。
—————————————–
5.同步系統時鐘
最好 協定 。 同步 伺服器 透過 Internet 將系統時鐘與 NTP(網路時間 只需運行)
終端機指令:
apt -y install ntp
—————————————–
7 安裝 Postfix、Dovecot、MariaDB、rkhunter 和 Binutils
終端機指令:
apt -y install postfix postfix-mysql postfix-doc mariadb-client mariadb-server openssl getmail6 rkhunter binutils dovecot-imapd dovecot-pop3d dovecot-mysql dovecot-sieve dovecot-lmtpd sudo curl rsyslog wget gnupg2 lsb-release ufw
—————————————–
您將被問到以下問題:
General type of mail configuration(郵件配置的一般類型): <– 網站網址
System mail name(系統郵件名稱): <– server1.example.com
若要保護 MariaDB 安裝並停用測試資料庫,請執行以下命令:
終端機指令:
mysql_secure_installation
—————————————–
Switch to unix_socket authentication [Y/n] <– n
Change the root password? [Y/n] <– y
New password: <– 輸入新的密碼
Re-enter new password: <– 再次 輸入新的密碼
Remove anonymous users? [Y/n] <– y
Disallow root login remotely? [Y/n] <– y
Remove test database and access to it? [Y/n] <– y
Reload privilege tables now? [Y/n] <– y
—————————————–
接下來,在 Postfix 中開啟 TLS/SSL 和提交連接埠:
終端機指令:
vi /etc/postfix/master.cf
————————————–
取消 註釋提交 和 提交 部分,如下所示,並在必要時添加行,以便 master.cf 檔案的此部分與下面的部分完全相同。
重要提示: 刪除以提交和提交開頭的行前面的 #,而不僅僅是這些行之後的 -o 行!
—————————————-
[...]
#127.0.0.1:submission inet n - y - - smtpd
submission inet n - y - - smtpd
-o syslog_name=postfix/submission
-o smtpd_tls_security_level=encrypt
-o smtpd_sasl_auth_enable=yes
# -o smtpd_tls_auth_only=yes
# -o smtpd_reject_unlisted_recipient=no
# Instead of specifying complex smtpd__restrictions here,
# specify "smtpd__restrictions=$mua__restrictions"
# here, and specify mua__restrictions in main.cf (where
# "" is "client", "helo", "sender", "relay", or "recipient").
# -o smtpd_client_restrictions=
# -o smtpd_helo_restrictions=
# -o smtpd_sender_restrictions=
# -o smtpd_relay_restrictions=
# -o smtpd_recipient_restrictions=permit_sasl_authenticated,reject
# -o milter_macro_daemon_name=ORIGINATING
# Choose one: enable submissions for loopback clients only, or for any client.
#127.0.0.1:submissions inet n - y - - smtpd
submissions inet n - y - - smtpd
-o syslog_name=postfix/submissions
-o smtpd_tls_wrappermode=yes
-o smtpd_sasl_auth_enable=yes
# -o smtpd_reject_unlisted_recipient=no
# Instead of specifying complex smtpd__restrictions here,
# specify "smtpd__restrictions=$mua__restrictions"
# here, and specify mua__restrictions in main.cf (where
# "" is "client", "helo", "sender", "relay", or "recipient").
# -o smtpd_client_restrictions=
# -o smtpd_helo_restrictions=
# -o smtpd_sender_restrictions=
# -o smtpd_relay_restrictions=
# -o smtpd_recipient_restrictions=permit_sasl_authenticated,reject
# -o milter_macro_daemon_name=ORIGINATING
#628 inet n - y - - qmqpd
[...]
—————————————-
之後重新啟動 Postfix:
終端機指令:
systemctl restart postfix
—————————————-
如果您希望 MySQL 偵聽所有接口,而不僅僅是本機主機,以允許從桌面工具存取 MySQL
則編輯 /etc/mysql/mariadb.conf.d/50-server.cnf 並註解掉 bind-address = 行127.0.0.1 在前面加上#。
終端機指令:
vi /etc/mysql/mariadb.conf.d/50-server.cnf
——————-
[...]
# Instead of skip-networking the default is now to listen only on
# localhost which is more compatible and is not less secure.
#bind-address = 127.0.0.1
[...]
—————————————-
編輯檔案 /etc/mysql/debian.cnf 並在以單字「password」開頭的行中兩次設定 MYSQL / MariaDB root 密碼。
vi /etc/mysql/debian.cnf
————————————
# Automatically generated for Debian scripts. DO NOT TOUCH!
[client]
host = localhost
user = root
password = "howtoforge"
[mysql_upgrade]
host = localhost
user = root
password = "howtoforge"
————————————
為了防止錯誤“ 接受錯誤:開啟檔案太多 ”,我們現在將為 MariaDB 設定更高的開啟檔案限制。
使用編輯器開啟檔案 /etc/security/limits.conf:
終端機指令:
vi /etc/security/limits.conf
——————
mysql soft nofile 65535
mysql hard nofile 65535
————————————
接下來,使用 mkdir 指令建立一個新目錄 /etc/systemd/system/mysql.service.d/
終端機指令:
mkdir -p /etc/systemd/system/mysql.service.d/
並在其中新增一個檔案:
vi /etc/systemd/system/mysql.service.d/limits.conf
將以下行貼到該文件中:
———————-
systemctl daemon-reload
systemctl restart mariadb
————————————
現在檢查網路是否已啟用。
執行
終端機指令:
netstat -tap | grep mysql
———————-
輸出應如下所示:
root@server1:/home/administrator# netstat -tap | grep mysql
tcp6 0 0 [::]:mysql [::]:* LISTEN 16623/mysqld
————————————
7.安裝電子郵件過濾和簽名軟體 Rspamd 和 ClamAV
終端機指令:
CODENAME=`lsb_release -c -s`
wget -qO- https://rspamd.com/apt-stable/gpg.key | tee /etc/apt/trusted.gpg.d/rspamd.asc > /dev/null
echo "deb [arch=amd64] http://rspamd.com/apt-stable/ $CODENAME main" > /etc/apt/sources.list.d/rspamd.list
echo "deb-src [arch=amd64] http://rspamd.com/apt-stable/ $CODENAME main" >> /etc/apt/sources.list.d/rspamd.list
—————————————–
要安裝 Rspamd 和 ClamAV,我們運行
終端機指令:
apt install rspamd redis clamav clamav-daemon unzip bzip2 arj nomarch lzop cabextract p7zip p7zip-full unrar lrzip apt-listchanges libnet-ldap-perl libauthen-sasl-perl cavp-listchanges libnet-ldap-perl libauthen-sasl-perl cavy-docspert. libnet -ident-perl zip libnet-dns-perl libdbd-mysql-perl postgrey -y
—————————–
在 Rspamd 配置中啟動 Redis
echo 'servers = "127.0.0.1";' > /etc/rspamd/local.d/redis.conf
——————-
增加 Rspamd 歷史記錄,啟用壓縮並在歷史記錄中顯示主題。 此步驟是可選的。
echo "nrows = 2500;" > /etc/rspamd/local.d/history_redis.conf
echo "compress = true;" >> /etc/rspamd/local.d/history_redis.conf
echo "subject_privacy = true;" >> /etc/rspamd/local.d/history_redis.conf
———————
然後重新啟動 Rspamd
systemctl restart rspamd
————————————–
8.安裝 Apache Web 伺服器和 PHP
Apache2、PHP、FCGI、suExec、Pear 和 mcrypt 可以如下安裝:
終端機指令:
apt -y install apache2 apache2-utils php8.2 php8.2-fpm php8.2-common php8.2-gd php8.2-mysql php8.2-imap php8.2-cli php8.2-cgi libapache2-mod-fcgid apache2-suexec-pristine php-pear mcrypt imagemagick libruby libapache2-mod-python php8.2-curl php8.2-intl php8.2-pspell php8.2-sqlite3 php8.2-tidy php8.2-xmlrpc php8.2-xsl memcached php-memcache php-imagick php8.2-zip php8.2-mbstring memcached libapache2-mod-passenger php8.2-soap php8.2-opcache php-apcu libapache2-reload-perl php8.2-mcrypt
————————————–
現在在 Apache 中啟用 php-fpm:
a2enmod proxy_fcgi setenvif
a2enconf php8.2-fpm
——————————-
然後執行以下命令以啟用其他 Apache 模組 suexec 、 rewrite 、 ssl 、 actions 和 include ( 請加上dav 、 dav_fs 和 auth_digest ): 如果要使用 WebDAV
a2enmod suexec rewrite ssl actions include dav_fs dav auth_digest cgi headers actions alias
———————
為了確保伺服器不會被 HTTPOXY漏洞 攻擊,我們透過新增設定檔/etc/apache2/conf-available/httpoxy.conf來全域停用apache中的HTTP_PROXY header。
注意: 該漏洞名為 httpoxy(不含“r”),因此我們會新增配置以防止漏洞的檔案名稱為 httpoxy.conf,而不是 httproxy.conf,因此檔案名稱中沒有缺少“r”。
終端機指令:
vi /etc/apache2/conf-available/ httpoxy .conf
———————
將以下內容貼到文件中:
———
<IfModule mod_headers.c>
RequestHeader unset Proxy early
</IfModule>
———————–
並透過運行啟用該模組:
a2enconf httpoxy
systemctl restart apache2
——————————————–
9.安裝 Let's Encrypt
終端機指令:
curl https://get.acme.sh | sh -s
——————————————–
10. 安裝 PureFTPd 和配額
PureFTPd 和配額可以使用以下指令安裝:
終端機指令:
apt install pure-ftpd-common pure-ftpd-mysql quota quotatool
——————
為 pure-ftpd 建立 dhparam 檔案:
終端機指令:
openssl dhparam -out /etc/ssl/private/pure-ftpd-dhparams.pem 2048
——————
編輯檔案 /etc/default/pure-ftpd-common …
終端機指令:
vi /etc/default/pure-ftpd-common
—————————————————–
…並確保啟動模式設定為 獨立 並設定 VIRTUALCHROOT=true :
—————
[...]
STANDALONE_OR_INETD=standalone
[...]
VIRTUALCHROOT=true
[...]
——————————————————
現在我們配置 PureFTPd 以允許 FTP 和 TLS 會話。
FTP 是一種非常不安全的協議,因為所有密碼和所有資料都以明文形式傳輸。
透過使用 TLS,可以對整個通訊進行加密,從而使 FTP 更加安全。
如果您想允許 FTP 和 TLS 會話,請執行
終端機指令:
echo 1 > /etc/pure-ftpd/conf/TLS
————-
要使用 TLS,我們必須建立 SSL 憑證。 中建立它 我在/etc/ssl/private/ ,因此我首先建立該目錄:
終端機指令:
mkdir -p /etc/ssl/private/
————-
之後,我們可以產生SSL證書,如下所示:
openssl req -x509 -nodes -days 7300 -newkey rsa:2048 -keyout /etc/ssl/private/pure-ftpd.pem -out /etc/ssl/private/pure-ftpd.pem
—————————–
Country Name (2 letter code) [AU]: <-- 輸入您的國家名稱(例如「DE」)
State or Province Name (full name) [Some-State]: <-- 輸入您的州或省名稱.
Locality Name (eg, city) []: <-- 輸入您的城市.
Organization Name (eg, company) [Internet Widgits Pty Ltd]: <-- 輸入您的組織名稱(例如,您的公司名稱).
Organizational Unit Name (eg, section) []: <-- 輸入您的組織單位名稱(例如「IT 部門」).
Common Name (eg, YOUR name) []: <-- 輸入系統的完全限定網域名稱(例如「server1.example.com」).
Email Address []: <-- 輸入您的電子郵件地址.
——————
更改SSL憑證的權限:
終端機指令:
chmod 600 /etc/ssl/private/pure-ftpd.pem
——————–
然後重新啟動 PureFTPd:
終端機指令:
systemctl restart pure-ftpd-mysql
——————–
編輯 /etc/fstab 。 我的看起來像這樣(我將 ,usrjquota=quota.user,grpjquota=quota.group,jqfmt=vfsv0 的分區 添加到帶有掛載點/ ):
————–
終端機指令:
vi /etc/fstab
————————-
# /etc/fstab: static file system information.
#
# Use 'blkid' to print the universally unique identifier for a
# device; this may be used with UUID= as a more robust way to name devices
# that works even if disks are added and removed. See fstab(5).
#
# <file system> <mount point> <type> <options> <dump> <pass>
# / was on /dev/sda1 during installation
UUID=45576b38-39e8-4994-b8c1-ea4870e2e614 / ext4 errors=remount-ro,usrjquota=quota.user,grpjquota=quota.group,jqfmt=vfsv0 0 1
# swap was on /dev/sda5 during installation
UUID=8bea0d1e-ec37-4b20-9976-4b7daaa3eb69 none swap sw 0 0
/dev/sr0 /media/cdrom0 udf,iso9660 user,noauto 0 0
——————————————
若要啟用配額,請執行以下命令:
終端機指令:
mount -o remount /
systemctl daemon-reload
———–
終端機指令:
quotacheck -avugm
quotaon -avug
——————-
您將收到訊息“ quotaon:您的核心可能支援 ext4 配額功能,但您正在使用外部配額檔案。
請切換您的檔案系統以使用 ext4 配額功能,因為 ext4 上的外部配額檔案已被棄用。
”這是可以的,可以忽略。
————————————
11.安裝BIND DNS伺服器
BIND 可以如下安裝:
終端機指令:
apt install bind9 dnsutils
———————
如果您的伺服器是虛擬機,則強烈建議安裝 hasged 守護程式以獲得更高的 DNSSEC 簽章熵。
您也可以在非虛擬伺服器上安裝haveged,它應該不會有什麼壞處。
終端機指令:
apt install haveged
————————————-
12.安裝 Webalizer 取代 awffull、AWStats 和 GoAccess
Webalizer 和 AWStats 可以如下安裝:
終端機指令:
apt install awffull awstats geoip-database libclass-dbi-mysql-perl libtimedate-perl
————————-
建立 webalizer 目錄和符號鏈接,以便 awffull 被識別為 webalizer:
終端機指令:
mkdir /etc/webalizer
chmod 0755 /etc/webalizer
ln -s /etc/awffull/awffull.conf /etc/webalizer/webalizer.conf
ln -s /usr/bin/awffull /usr/bin/webalizer
—————————–
之後打開 /etc/cron.d/awstats …
終端機指令:
vi /etc/cron.d/awstats
———————–
….並註解掉該文件中的所有內容:
—————
#MAILTO=root
#*/10 * * * * www-data [ -x /usr/share/awstats/tools/update.sh ] && /usr/share/awstats/tools/update.sh
# Generate static reports:
#10 03 * * * www-data [ -x /usr/share/awstats/tools/buildstatic.sh ] && /usr/share/awstats/tools/buildstatic.sh
——————
直接從 GoAccess 儲存庫安裝最新的 GoAccess 版本:
echo "deb https://deb.goaccess.io/ $(lsb_release -cs) main" | tee -a /etc/apt/sources.list.d/goaccess.list
wget -O - https://deb.goaccess.io/gnugpg.key | tee /etc/apt/trusted.gpg.d/goaccess.asc >/dev/null
apt update
apt install goaccess
———————————————–
13.安裝 Jailkit
只有當您想要 chroot SSH 使用者時才需要 Jailkit。 可以如下安裝:
終端機指令:
apt install jailkit
———————————————–
14.安裝fail2ban和UFW防火牆 15 安裝fail2ban和UFW防火牆
這是可選的,但建議這樣做,因為 ISPConfig 監視器會嘗試顯示日誌:
終端機指令:
apt install fail2ban
———————
若要讓fail2ban監視PureFTPd和Dovecot,請建立檔案 /etc/fail2ban/jail.local :
終端機指令:
vi /etc/fail2ban/jail.local
—————————-
並向其添加以下配置。
—————
[pure-ftpd]
enabled = true
port = ftp
filter = pure-ftpd
logpath = /var/log/syslog
maxretry = 3
[dovecot]
enabled = true
filter = dovecot
logpath = /var/log/mail.log
maxretry = 5
[postfix-sasl]
enabled = true
port = smtp
filter = postfix[mode=auth]
logpath = /var/log/mail.log
maxretry = 3
—————
之後重新啟動 fail2ban:
終端機指令:
systemctl restart fail2ban
———————
若要安裝 UFW 防火牆,請執行以下 apt 命令:
終端機指令:
apt install ufw
———————————-
15.安裝 PHPMyAdmin 資料庫管理工具
使用 apt 安裝 phpMyAdmin:
終端機指令:
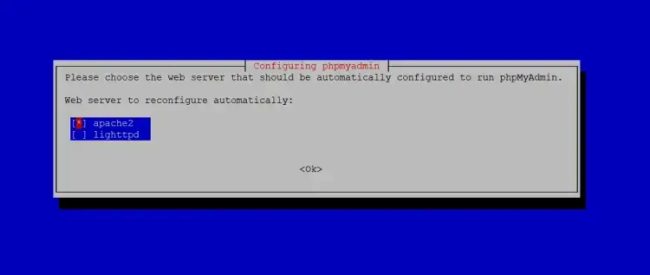
apt install phpmyadmin
選擇在 Apache 中啟用 phpMyAdmin:
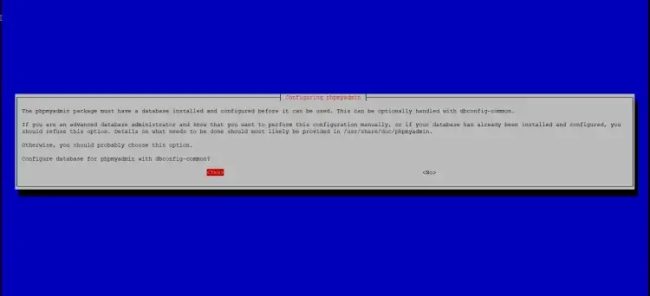
使用 dbconfig common 設定 PHPMyAdmin
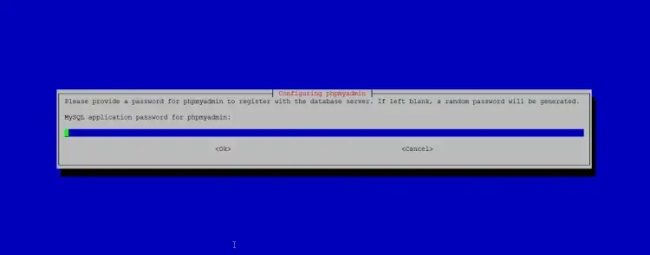
將應用程式密碼欄位留空並按下回車鍵。 Apt 會自動建立安全的隨機密碼,日後造訪 PHPMyAdmin 時無須知道該密碼。
——————————————————–
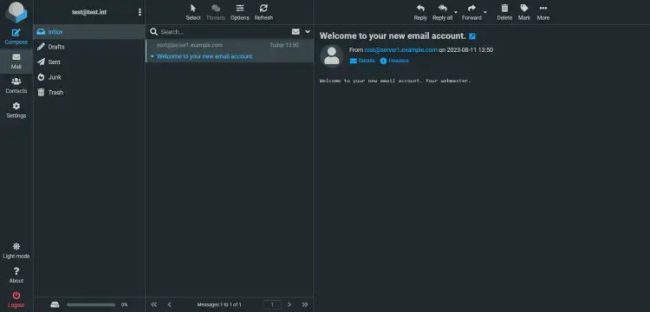
16.安裝 RoundCube Webmail(可選)
在本章中,我們將安裝 RoundCube 網路郵件用戶端。
然後使用以下命令安裝 RoundCube:
終端機指令:
apt install roundcube roundcube-core roundcube-mysql roundcube-plugins
—————————
安裝程式將詢問以下問題:
Configure database for roundcube with dbconfig.common? <-- yes
MySQL application password for roundcube: <-- 按回車鍵 enter
—————————–
然後編輯 Apache RoundCube 設定檔 /etc/apache2/conf-enabled/roundcube.conf:
終端機指令:
vi /etc/apache2/conf-enabled/roundcube.conf
———————-
並為 apache /webmail 別名新增一個別名行,為 /roundcube 新增一個別名行,您可以在檔案的開頭新增該行。
注意:請勿使用 /mail 作為別名,否則 ispconfig 電子郵件模組將停止運作!
終端機指令:
Alias /roundcube /var/lib/roundcube/public_html
Alias /webmail /var/lib/roundcube/public_html
——————————
然後重新載入 Apache:
終端機指令:
systemctl reload apache2
——————————
現在編輯 RoundCube 設定檔:
終端機指令:
vi /etc/roundcube/config.inc.php
————-
並更改行:
$config['smtp_host'] = 'localhost:587';
變成:
$config['smtp_host'] = 'localhost:25';
——————————–
現在您可以如下存取 RoundCube:
https://192.168.0.100:8081/webmail
https://www.example.com:8081/webmail
——————————————
17.下載ISPConfig 3.2
若要從最新發佈的版本安裝 ISPConfig 3,請執行以下操作:
終端機指令:
cd /tmp
wget http://www.ispconfig.org/downloads/ISPConfig-3-stable.tar.gz
tar xfz ISPConfig-3-stable.tar.gz
cd ispconfig3_install/install/
——————————–
18.安裝ISPConfig
下一步是執行 ISPConfig 安裝程式。
終端機指令:
php -q install.php
———————–
這將啟動 ISPConfig 3 安裝程式。 安裝程式將為您配置所有服務,例如 Postfix、Dovecot 等。
終端機指令:
php -q install.php
——————————–
>> Initial configuration
—————————-
Operating System: Debian 12.0 (Bookworm) or compatible
—————————-
Following will be a few questions for primary configuration so be careful.
Default values are in [brackets] and can be accepted with <ENTER>.
—————————-
Select language (en,de) [en]: <-- 按下 enter
Installation mode (standard,expert) [standard]: <-- 按下 enter
Full qualified hostname (FQDN) of the server, eg server1.domain.tld [server1.example.com]: <-- 按下 enter
MySQL server hostname [localhost]: <-- 按下 enter
MySQL server hostname [localhost]: <-- 按下 enter
MySQL server port [3306]: <-- 按下 enter
MySQL root username [root]: <-- 按下 enter
MySQL root password []: <-- 輸入 MySQL root 密碼
MySQL database to create [dbispconfig]: <-- 按下 enter
MySQL charset [utf8]:
———————————–
Checking MariaDB version 10.11.3 .. OK
Configuring Postgrey
Configuring Postfix
[....]
-----
You are about to be asked to enter information that will be incorporated
into your certificate request.
What you are about to enter is what is called a Distinguished Name or a DN.
There are quite a few fields but you can leave some blank
For some fields there will be a default value,
If you enter '.', the field will be left blank.
-----
Country Name (2 letter code) [AU]: <-- 輸入 國家編碼
State or Province Name (full name) [Some-State]: <-- 輸入 那一州?
Locality Name (eg, city) []: <-- 輸入 城市
Organization Name (eg, company) [Internet Widgits Pty Ltd]: <-- 輸入公司名稱
Organizational Unit Name (eg, section) []: <-- 按下 enter
Common Name (e.g. server FQDN or YOUR name) []: <-- 輸入伺服器 hostname
Email Address []: <-- 輸入 email 地址
[INFO] service Mailman not detected
Configuring Dovecot
Creating new DHParams file, this takes several minutes. Do not interrupt the script.
Generating DH parameters, 2048 bit long safe prime
[.....]
[INFO] service Spamassassin not detected
[INFO] service Amavisd not detected
Configuring Rspamd
Configuring Getmail
Configuring Jailkit
Configuring Pureftpd
Configuring BIND
Configuring Apache
Configuring vlogger
[INFO] service OpenVZ not detected
Configuring AppArmor
Configuring Ubuntu Firewall
[INFO] service Metronome XMPP Server not detected
Configuring Fail2ban
Installing ISPConfig
ISPConfig Port [8080]: <-- 按下 enter
—————————————-
Admin password [8563a921]: <-- 輸入你 ISPConfig admin密碼, 或按 enter 鍵接受顯示的密碼
—————
Do you want a secure (SSL) connection to the ISPConfig web interface (y,n) [y]: <-- 按下 enter
—————
Checking / creating certificate for server1.example.com
Using certificate path /etc/letsencrypt/live/server1.example.com
Server's public ip(s) (91.38.138.191, 2003:e1:bf42:2500:20c:29ff:fe32:617f) not found in A/AAAA records for server1.example.com:
Ignore DNS check and continue to request certificate? (y,n) [n]: <-- 按下 enter
—————
Could not issue letsencrypt certificate, falling back to self-signed.
[....]
-----
You are about to be asked to enter information that will be incorporated
into your certificate request.
What you are about to enter is what is called a Distinguished Name or a DN.
There are quite a few fields but you can leave some blank
For some fields there will be a default value,
If you enter '.', the field will be left blank.
-----
Country Name (2 letter code) [AU]: <-- 輸入國家代碼
State or Province Name (full name) [Some-State]: <-- 輸入州
Locality Name (eg, city) []: <-- 輸入城市
Organization Name (eg, company) [Internet Widgits Pty Ltd]: <-- 輸入公司名稱
Organizational Unit Name (eg, section) []: <-- 按下 enter
Common Name (e.g. server FQDN or YOUR name) []: <-- 輸入伺服器 hostname
Email Address []: <-- 輸入 email 地址
Symlink ISPConfig SSL certs to Postfix? (y,n) [y]: <-- 按下 Enter
————————————
Symlink ISPConfig SSL certs to Pure-FTPd? Creating dhparam file may take some time. (y,n) [y]: <-- 按下 Enter
————————————
Configuring Apps vhost
Configuring DBServer
Installing ISPConfig crontab
no crontab for getmail
Detect IP addresses
Restarting services ...
Installation completed.
————————-
安裝程式會自動設定所有底層服務,因此無需手動設定。
之後,您可以透過:
http(s)://server1.example.com:8080/
或
http(s)://192.168.0.100:8080/
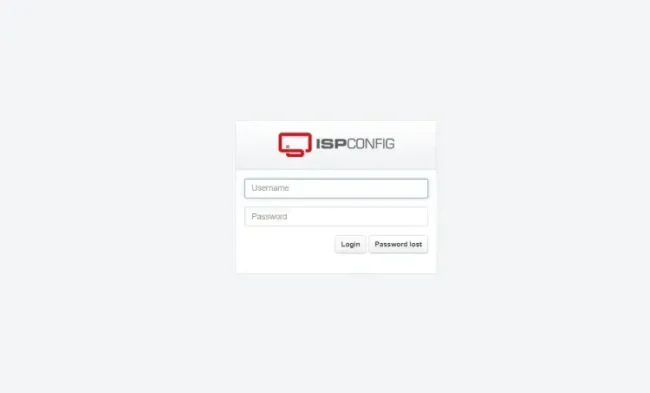
造訪 ISPConfig 3 (http 或https 取決於您在安裝過程中選擇的內容)。
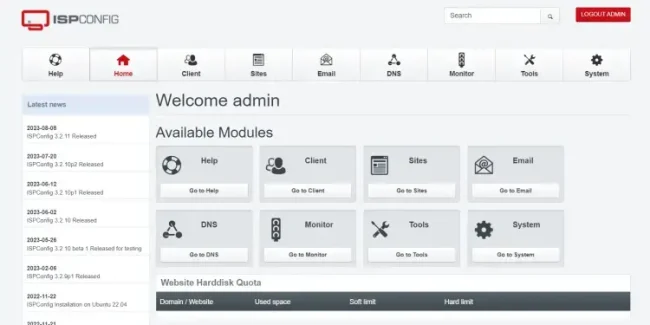
登入 使用使用者名稱admin 和密碼 admin (首次登入後應更改預設密碼):
————————-
該系統現在可以使用了。
————————————————————